Graphics for Digital Cutters
Tutorial

StylizedFlower
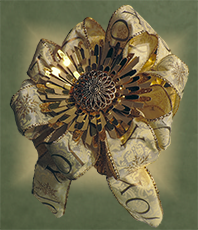
This flower is created with several different texture layers...metallic card stock, faux glitter card stock and neutral or kraft paper cardstock.
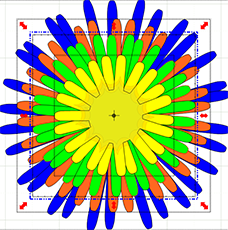
The default page in the MTC file shows how the layers are stacked. I did not use this page for cutting.
I've colored the layers differently for visual purposes only. I've also labeled each layer with the type of paper I used. I did not, however, use glitter paper. I cut those layers from metallic paper and applied glitter to them.
When I use this technique as opposed to actual glitter paper, I use gold metallic cardstock for gold glitter, silver metallic cardstock for silver glitter etc. That way my coverage does not have to be perfect.
For the neutral color, I used natural (brown paper bag color) card stock.
For ease of cutting, I put the metallic and glitter layers and the neutral layers on separate pages. If you use actual glitter paper, you will need to separate the layers further by creating a new page or turning off the eye on the ones you don't want to cut.
There are two layers to each row of petals. Assemble them stacked offset from each other.
There are 3 sets of the neutral color layers. Use one set for the second row of the flower.
The extras can be stacked into 2 more rows of two layers each and added on top of row two, or they can be inserted between any of the other rows, if desired, because of the next step.
When I had everything assembled, I gave the flower a haircut with my scissors. I left some of the petals long and rounded, cut some squared straight across and some were cut at an angle.
I also cut some petals different lengths so they weren't so perfect and no two flowers are ever the same.
I used pop dots between the center layers.
I added a decorative button to the center of the above flower and used it for the center of a handmade bow.
I personally like the look of the humble kraft paper mixed with the more elegant metallic and glitter. I hope you do as well.